Course description

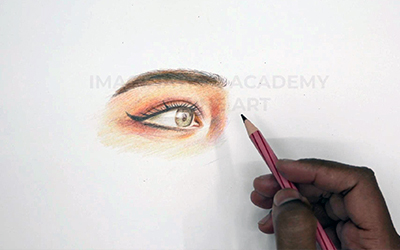
Color pencil medium is a highly versatile and precise art form, made from either wax or oil-based pigments encased in wood. Known for their rich colors and ability to create fine details, color pencils are ideal for both beginners and experienced artists. They allow for controlled application, enabling the artist to create smooth gradients, sharp lines, and intricate textures.

Color pencils excel at layering, where the artist can apply multiple layers of color to build up depth, richness, and complexity. They can be blended using different techniques, such as burnishing (pressing firmly to smooth the colors) or blending with solvents to dissolve the binder, creating a more painterly effect.

One of the key advantages of color pencils is their portability and ease of use. Artists can work on the go without the need for additional materials like water or brushes. They can be used on a variety of surfaces, including paper, Bristol board, and toned paper, each offering unique visual results.

The medium is often favored for creating realistic and detailed illustrations, from botanical art to portraits, as well as more abstract or expressive styles. With a wide range of color pencil brands available, artists can choose from soft, creamy pencils for smooth coverage or harder leads for crisp, clean lines.

Color pencil medium offers a clean and mess-free alternative to traditional wet mediums while still providing the ability to achieve highly polished, professional-quality artwork.

What will i learn?

  • 1. Understanding Color Pencils: Learn the differences between wax-based and oil-based colored pencils, and how their properties affect your drawing style and techniques.
  • 2. Color Blending: Master various blending techniques, such as layering, burnishing, and using solvents to achieve smooth transitions and richer color depth.
  • 3. Creating Texture: Explore how to create textures using color pencils, from smooth gradients to rough, textured effects that bring your drawings to life.
  • 4. Shading and Gradients: Learn how to apply even shading, create gradients, and build depth by using light, medium, and dark tones to render realistic shadows and highlights.
  • 5. Layering Techniques: Discover how to layer colors to achieve vivid, multi-dimensional effects without muddying the pigments, and how to use lighter colors to blend or soften the layers.
  • 6. Detailed Work: Practice creating fine details and intricate patterns by adjusting pencil pressure and using sharpened tips for precision.
  • 7. Color Theory: Understand the basics of color theory, including how to combine colors, use complementary colors for contrast, and apply analogous colors for harmony.
  • 8. Realism and Fine Art: Learn to create highly realistic drawings, focusing on proportions, textures, and accurate color representation for subjects like portraits, still life, and landscapes.
  • 9. Working on Different Surfaces: Explore the effects of using color pencils on various surfaces, such as smooth paper, textured paper, and toned backgrounds, and how these surfaces influence the final outcome.
  • 10. Fixatives and Finishing Touches: Learn how to protect your artwork using fixatives and how to add final details to make your piece stand out.
  • 11. Problem Solving and Corrections: Discover tips and tricks for fixing mistakes or making adjustments, such as lightning areas or blending out harsh lines.

Requirements

  • 1. Color Pencils: o A set of high-quality color pencils, either wax-based (e.g., Prismacolor) or oil-based (e.g., Faber-Castell Polychromos). Choose a range of colors for versatility.
  • 2. Paper: o Smooth or textured paper that can handle layering and blending, such as:  Bristol board (smooth or vellum)  Watercolor paper (for more texture)  Toned paper (for interesting base colors)  Drawing paper (acid-free, heavyweight)
  • 3. Blending Tools: o Blending stumps (tortillons) for controlled blending. o Cotton swabs or soft brushes for smooth transitions. o Solvents (e.g., odorless mineral spirits) for dissolving the pencil binder to create a painterly effect.
  • 4. Erasers: o Kneaded eraser for lifting color and soft corrections. o Precision erasers or mono erasers for detailed erasing and highlights.
  • 5. Pencil Sharpener: o A high-quality manual or electric sharpener for keeping pencils sharp. o A craft knife can be used for sharpening without breaking delicate pencil leads.
  • 6. Fixative Spray: o Workable fixative spray to protect the artwork from smudging and to preserve color vibrancy over time
  • 7. Burnishing Tools: o A colorless blender pencil or white pencil for burnishing (pressing the colors together for a smooth finish). o A metal burnisher can also be used for adding polish and smoothing out layers.
  • 9. Graphite Pencils: o Light graphite pencils (HB or H) for sketching out your initial designs without creating too much dark lead that interferes with the color pencils.
  • 10. Blotting Paper or Tissue: o For wiping hands or tools and for laying on top of your artwork to prevent smudging while you work.
  • 11. Colorless Blender: o A colorless blending pencil or marker can be used to blend colors without adding more pigment.
  • 12. Reference Images: o High-quality reference photos or objects for practice, such as botanical subjects, portraits, or landscapes
  • 13. Masking Tape or Clips: o To secure your paper to a drawing board or surface while you work, ensuring the paper doesn’t move or buckle.

Frequently asked question

o Wax-based pencils are softer and blend more easily but may develop a "wax bloom" over time. Oil-based pencils are firmer, offer more precision, and are less prone to wax bloom, making them better for detailed work.

colored pencils? o Yes, blending is a key technique in color pencil work. You can blend by layering colors, using a burnishing technique (applying heavy pressure), or using solvents like mineral spirits to dissolve the binder and create smooth transitions.

o It's best to use a heavyweight, textured paper (such as Bristol or watercolor paper) that can handle multiple layers without tearing or warping. Textured paper helps the color adhere and makes blending easier.

o To achieve smooth shading, use light, even strokes and build up layers gradually. You can also use a burnisher or blending tool to smooth out the colors and remove visible pencil strokes.

o You can use a kneaded eraser to lift some of the pigment, or carefully apply a light layer of a lighter color to soften areas. For precise corrections, use a precision eraser or a sharp craft knife to gently scrape off unwanted pigment.

o To avoid visible pencil strokes, use circular or cross-hatching motions with light pressure, then gradually build up layers of color. Burnishing the final layer will help blend the colors and eliminate strokes.

o Yes! You can mix color pencils with other dry media like graphite, charcoal, or pastels, or even with watercolors. Just make sure the base medium is dry before applying the color pencils.

o You can leave areas of the paper untouched for natural highlights, or use a white or light-colored pencil on top of darker areas to create highlights. For crisp highlights, a white gel pen or eraser can be used.

o The number of layers depends on the paper’s texture and weight. Heavier, textured paper can hold more layers, but it’s important to apply light pressure to avoid damaging the surface when building up multiple layers.

o Wax bloom is a cloudy film that can appear on wax-based colored pencil drawings over time. To prevent it, you can use a fixative spray to seal your work or gently wipe the drawing with a soft cloth if wax bloom develops

o Burnishing is a technique where you apply heavy pressure with a light-colored or colorless pencil to smooth out and blend the layers of color. It creates a polished, almost painted effect.

o A fixative isn’t necessary but can help protect your drawing from smudging and preserve its vibrancy. Be sure to use a fixative specifically designed for dry mediums like color pencils.

o Yes, but be careful not to break the tip. Use a high-quality sharpener or a craft knife to gently sharpen the pencil. For very fine details, keep a steady hand and apply light pressure.

Prashant Arya

Dedicated and passionate art teacher with 11 year of experience inspiring creativity and fostering artistic skills in students of all ages. Proficient in various mediums and techniques. Skilled in curriculum development, classroom management and fostering a supportive learning environment.

Helped students prepare portfolios of work for college and university applications. Demonstrated diverse art techniques, explaining cultural components to increase understanding. Supported creative exploration and experimentation with new mediums and techniques.Director - imagination academyDehradun | 2018 - Present

499₹

1200₹

Lectures

2

Skill level

Beginner

Expiry period

Lifetime

Related courses