Course description

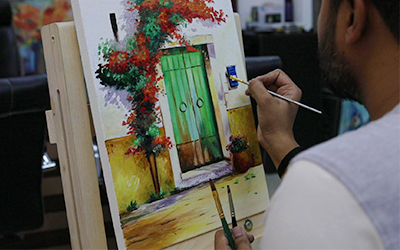
In this oil color landscape tutorial, you'll learn how to paint a beautiful, vibrant scene from start to finish. Whether you're a beginner or an experienced artist, this guide will walk you through each step, covering essential techniques like color mixing, composition, and brush handling. You'll discover how to build depth in single layer, create realistic textures, and use light and shadow to add a sense of atmosphere to your painting. By the end of this tutorial, you'll have the skills and confidence to capture the natural beauty of landscapes in your own unique style.

What will i learn?

  • 1. Basic Composition Techniques: Understand how to plan and sketch an effective landscape composition.
  • 2. Color Mixing Fundamentals: Learn how to mix oil paints to create natural hues for skies, foliage, water, and ground elements.
  • 3. Single Layering and Glazing: Discover how to build depth in your painting using single layer, from blocking in basic shapes to adding details.
  • 4. Brushwork Techniques: Master different brush strokes for creating textures, such as foliage, clouds, and water.
  • 5. Light and Shadow: Understand how to use highlights and shadows to add realism and a sense of atmosphere.
  • 6. Creating Depth and Perspective: Learn how to achieve depth in your painting by using techniques like aerial perspective and overlapping elements.
  • 7. Final Detailing: Explore how to add finishing touches to enhance realism and bring your landscape to life.

Requirements

  • • Oil paints (a basic set with primary colors, white, and black)
  • • Canvas or canvas board
  • • Various brushes (round, flat, and detail brushes)
  • • Palette and palette knives
  • • Odorless solvent (for thinning and cleaning)
  • • Linseed oil (optional, for mixing and glazing)
  • • Easel (optional but recommended)

Frequently asked question

o You'll need oil paints, brushes, a palette, canvas or painting surface, linseed oil or other mediums, and a palette knife. A good set of colors for landscapes includes various shades of blue, green, yellow, brown, and white.

o For landscape painting, use a mix of brushes like flat, round, and fan brushes. Flats are great for bold strokes and covering large areas, rounds are good for details, and fan brushes work well for creating textures like foliage.

o Start by understanding basic color theory. Mix primary colors to create secondary colors and adjust the hue with complementary colors to get natural shades. Adding white can create tints, while mixing small amounts of complementary colors can help neutralize and create more natural tones.

o To create depth, use atmospheric perspective by painting distant objects in cooler, lighter colors and reducing detail. Overlapping elements, reducing contrast in the background, and using diminishing sizes for distant objects also help to create a sense of depth.

o Use soft, blended strokes for the sky to achieve smooth gradients, starting with lighter colors near the horizon. For clouds, use a combination of soft, rounded strokes and pay attention to light and shadow to give them volume and a fluffy appearance.

o To avoid muddy colors, clean your brush between color changes and limit the number of colors mixed at once. Make sure each layer is dry before adding new ones to prevent colors from blending unintentionally.

o A painting is finished when it achieves your intended effect and communicates the mood or atmosphere you want. Look at it from a distance to check balance, and make sure there’s a clear focal point and that the composition feels complete.

o Identify the light source and consider how it affects the landscape elements. Use lighter tones for highlights and darker shades for shadows, adjusting color temperature accordingly to add realism and enhance the atmosphere.

o Both options are possible. Painting from a reference, like a photo or real-life scene, can help you understand realistic elements. Painting from imagination allows for creative interpretation, but a good understanding of landscape elements and lighting is helpful.

o Drying time varies based on paint thickness, colors used, and environmental conditions. Generally, oil paintings can take a few days to weeks to dry to the touch, and complete curing may take several months. Using drying mediums can speed up the process

Prashant Arya

Dedicated and passionate art teacher with 11 year of experience inspiring creativity and fostering artistic skills in students of all ages. Proficient in various mediums and techniques. Skilled in curriculum development, classroom management and fostering a supportive learning environment.

Helped students prepare portfolios of work for college and university applications. Demonstrated diverse art techniques, explaining cultural components to increase understanding. Supported creative exploration and experimentation with new mediums and techniques.Director - imagination academyDehradun | 2018 - Present

599₹

1800₹

Lectures

3

Skill level

Intermediate

Expiry period

Lifetime

Related courses